Tuesday, January 24, 2017

Teaching Days Of The Week To Special Need Children


Explain to your child that every day is a new day. The first step is to teach your child that every time he wakes up, it's the start of a new day.


Name the days of the week. Teach your child the names of the days of the week — Monday, Tuesday, Wednesday, Thursday, Friday, Saturday and Sunday. Tell him what day today is.

Write the days of the week on flash cards and teach your child to rank them in the correct order. Arrange them on a table or on the wall and practice together.


Explain that there are only seven days in a week. Try to explain to your child that seven days make one week. When one week is over, another one begins.


Teach your child to distinguish between today, yesterday and tomorrow. Although it can be confusing for them, try to explain to your child the difference between yesterday, today and tomorrow.

1. Explain yesterday: Tell your child that yesterday was the day before today. Name it and connect it with what you were actually doing yesterday.

2.Explain today. Tell your child that this is the current day and try to connect it with the activities that are planned for today.

3· Explain tomorrow. Explain that tomorrow will come after today. Name that day and emphasize the activities that will mark it


Explain the difference between working days and weekends. Tell your child that Monday, Tuesday, Wednesday, Thursday and Friday are the days when kids go to school and parents go to work. That is why these days are called working days.

1· Then explain that Saturday and Sunday are the weekend, a time for relaxation and fun, when there is no school or work.

Show your child the days of the week on a calendar. On a calendar, show your child that one row makes one week. Point out each of the days and color code them to make them easier to distinguish, e.g. red for Monday, yellow for Tuesday, etc.

Introduce the days of the week through their schedule. Children may notice that some days are different from others due to the events they do on each day. Making an association between an event and a particularly day can help them to remember what day it is.

1. For example, Monday could be Art and craft day, Wednesday could be Aloo parathas for dinner, Sunday could be going to park or gaming zone etc.


countdown to important events. Counting down to an important event in the child's life can help them to keep track of the days.

1· For example, if they are excited about going to a birthday party on Saturday, in the week leading up to it you could ask them "How many days left until the party?".

2· Alternatively, if your child is excited about their own birthday coming up in several weeks, you could ask them "how many more Mondays until your birthday?"


Use fun, familiar songs to teach your child the days of the week. There are a number of very good song parodies that use familiar rhythms to teach the days of the week. Singing songs works well for memorization because the familiar pattern is easy for the brain to absorb. In addition, each song can be sung virtually anywhere giving the child even more time to practice and to learn the concept that is being taught.

1· According to experts, singing not only releases endorphins (feel good hormones) but also strengthens memory skills and brain development by making the brain work at several tasks at the same time.

2· In short, singing makes you happy and makes you smarter – so it is a perfect way to teach your child about the days of the week. You can even practice your new songs and skills in the car on the way to school or to run errands.


Let your child make her own calendar. Another great way to help your child learn the days of the week is to show her a calendar and have her say the days’ names with you. Then, with a blank calendar page have your child help you create a new calendar.

1· Have your child tell you what happens on each day of the week. For example, if she goes to preschool only three days of the week she could say “On Monday I go to school” and so on. Let your child use pictures cut from magazines or appropriate stickers to “tag” each day of the week so that it is easier for her to remember.

2· Mondays, Wednesdays and Fridays could get a school bus or a school building picture or sticker and then Tuesdays and Thursdays could get something that she associates with those days. Saturdays could have a picture of the supermarket or family event and then Sundays could have pictures of your house of worship if you so choose.


Use picture books. Try to find picture books that deal with the topic of the days of the week and read them to your child. If your child is able, have her read the book to you, or even try to explain the pictures and events.


Use jump rope and hopscotch to teach the days. Jumping rope or playing hopscotch while singing can be a good way to teach kids days of the week. While your child is jumping or skipping, they can sing:

“M for Monday, turn around, T for Tuesday, touch the ground, W for Wednesday, jump so high, T for Thursday, touch the sky, F for Friday, say hooray! S for Saturday, time to play, S for Sunday, clap your hands, It’s time to start all over again!”

In the same way, you can let your child play hopscotch. Draw 7 squares, one for each day a week. As your child jumps from square to square they can sing the song.


Thursday, January 5, 2017

Brushing Teeths..


An uphill battle for any parent, getting your child to brush his or her teeth can be a challenging task. For parents with special needs children, this is particularly true, due to ongoing oral-motor issues and oral sensitivities.

In order to better understand how tooth brushing can be a positive experience for both the parent and child, here are few tips for helping children with special needs brush their teeth.


1. First, let him/her face a mirror with you standing behind him/her. Using one hand to support his/her chin, and the other hand to help him/her brush.

2. If he/she can hold his/her own toothbrush, let him/her brush on his/her own. You need to supervise, observe and correct his/her brushing technique.


If the person doesn't know how to spit, it is difficult for him/her to rinse after tooth brushing.

You can first let him/her wear an apron to avoid getting his/her clothes wet. Prepare a glass of drinking water for him/her to rinse. When he needs to rinse, teach him/her to first open his/her mouth and then slowly pour the water into his/her mouth. Let the water flow out from his/her mouth so that the foam from toothpaste will be rinsed out from his/her mouth naturally.

@Swallowing toothpaste while brushing

Use only a pea-sized blob of toothpaste to brush his/her teeth. No harm will be done to his/her body even if he/she accidentally swallows the toothpaste. Fluoride is effective in preventing tooth decay and strengthening teeth, therefore it is essential that fluoride toothpaste is used. If you are worried that the fluoride content in toothpaste is too high, you might consider using children's fluoride toothpaste which contains only half of the fluoride content as the regular adult fluoride toothpaste.

@Involuntary wobbling of the head

You may stand behind him/her, use one hand to wrap around his/her head, and gently support his/her chin to stabilize his/her head. Remember to do this only if he/she is willing, otherwise he/she will refuse to brush or floss his/her teeth.

@Protruding tongue which interferes with toothbrushing

Tongue protrusion during toothbrushing is a natural reflex. You may first ask him/her to calm down and start toothbrushing for him/her as soon as he/she relaxes his/her tongue. There is only a short period of time while he relaxes his/her tongue. Therefore you may need to precisely place the toothbrush inside his/her mouth and speed up the brushing process to make toothbrushing more pleasant for him/her. You may also consider using an electric toothbrush to shorten the time needed for brushing. However, you should use a correct brushing technique with care in order to avoid damaging his/her teeth and gum.

@Biting on toothbrush

You may use some supplementary tools (e.g. a few chopsticks wrapped by a towel) for him/her to bite on one side of his/her mouth so that his/her mouth will stay opened. You can then place the toothbrush inside his/her mouth and start brushing on the other side of his/her mouth for him/her.

@Refuse toothbrushing

Find out the reason why he/she refuses to brush, then target at this reason to help him/her overcome his/her hard feelings towards brushing. If toothbrushing brings him/her discomfort, his/her gum may be sensitive due to gum inflammation. You may first choose a softer toothbrush and let him/her try to get used to brushing only a few teeth. After he/she gets used to brushing, you can then try to brush the rest of his/her teeth. Ask him/her to raise his/her hand when he/she feels uncomfortable and stop brushing to let him/her take a rest. It is important that you must not try to brush all his/her teeth by force. Otherwise, it will be difficult to change his/her attitude toward toothbrushing in the future.

@Gagging when he/she brushes his/her teeth

You may use a toothbrush with a smaller head. When you are brushing his/her molars, try not to place the toothbrush too far back as long as you can brush his/her last tooth in order to avoid gagging. If there are sensitive areas which make him/her gag, you should brush those areas last.

@Crooked teeth which are difficult to clean

You may use a toothbrush with a small head. Pay special attention to areas of irregularity to make sure that the bristles have touched the gingival margins. This could ensure that the teeth are thoroughly cleaned.

@Difficulty in inserting the dental floss into the interproximal area (area between the teeth)

Difficulty in inserting the dental floss into the interproximal area may be caused by the accumulation of calculus. The situation will improve once the calculus has been removed by the dentist. Remember to floss daily after the calculus has been removed in order to avoid accumulation again.

 Posting Reward Chart for brushing the teeths (pictures from Google)
Visual sequencing how to brush the teeths (pictures from Google)
posting some books on Brushing the teeths (Available on Amazon)

Hope the Blog is useful !!!
Happy Brushing :)


Wednesday, January 4, 2017

Calming Strategies


As much as you hate to see it in your own child, every child throws tantrums and has meltdowns, sometimes in the middle of the grocery store. This can be even more prevalent if your child has a language delay and doesn’t understand or can’t communicate what he wants. We’ve seen those kids, we call them “spoiled” and they have a long road ahead of them because they aren’t always going to get their way. Instead, your job is to teach your child how to deal with getting upset. In particular, it can be extremely helpful to teach your child calming strategies to calm himself or herself down. There are many calming strategies that you can teach your child to get through those awful meltdowns faster and without requiring you to bribe your child with ice cream and toys to make it stop. Calming children with self-calming strategies has worked for children across the world, and it can work for your child, too!


1 Don’t Give In


If this method is going to work at all, you HAVE to stop giving in to your child’s meltdowns.. If you try to teach your child these calming strategies but you eventually give in after he’s been screaming for 5 minutes (even if you only give in sometimes), the calming strategies will NEVER be as effective as throwing that tantrum so the tantrums will never stop and the calming strategies will never work. You have to stop giving in!! I know this can be so hard to do because you don’t want to see your child hurting and you don’t want to cause a scene in whatever public place you may happen to be, but this is crucial. If your child starts throwing a fit about something, you CANNOT give in, even if you were just about to change your mind anyway. Your child will feel like the tantrum worked to get him what he wanted and the next tantrum will be even bigger. Here’s what you should do at this point if your child is tantruming:
Remain calm, don’t show any emotion to your child. If you have to walk away so you can compose yourself, do that. If you need to tag in your spouse to handle the problem because you’re too emotional, do that.
Try to wait the tantrum out for a bit. See if it goes away on its own if you don’t give it much attention. Just monitor your child for safety and make sure that your child doesn’t put himself in any dangerous situations (like throwing a tantrum in the knife aisle at Bed, Bath, and Beyond). If he does, calmly move him away from danger without making a big deal out of it.
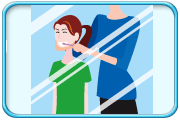
Remove your child from the situation. Carry him out of the store or back to his room. Try to isolate him from any attention he may get for the tantrum.
Wait till it passes. Because it will. Eventually, your child will tire and that’s when he will need a hug. Be there with his hug when he’s ready for it and have faith that the rest of these steps will make these tantrums better. (But again, don’t give in to what he wanted, even after the tantrum stops).


2. Identifying Calm Vs. Upset


The first thing you need to do is teach your child the difference between being calm and being upset. You will want to do this with your child when she is calm. I like to use a mood thermometer for this. A mood thermometer has a happy face at the bottom, an angry face at the top, and sometimes a few faces in between indicating someone who is on their way up or down the continuum.


Show your child the thermometer and say “when we are happy and calm, we are down here at the bottom”. Explain to your child that she is calm right now and show her where she is. You can even show her pictures of other children who are calm and happy. Then, tell her that when we are not happy, we are the top of the thermometer. We are upset. Show her pictures of children who are upset. You can type “child tantrum” into Google image search and get some pretty great upset children. Have her help you figure out which children look calm and which children look upset. You can also talk about some emotions in between, such as sad or scared. These often will lead to being upset if not dealt with early. Those will be the best times to try some calming strategies with your child. Keep working on labeling these emotions until your child is starting to understand them. You can even label her own emotions when you see them. For example, if your child is starting to get upset, show her the thermometer and say “You look sad” while pointing to the sad face. Just help her understand what those emotions look like and how they feel. I’ve even had some parents take pictures of their children displaying different emotions and use those to show their children. Be creative and talk about emotions a lot. Once your child starts to understand, move on to step three.


3. Teaching Calming Strategies when Calm


Think about your child when he’s in the middle of a tantrum. Do you think now would be a good time to teach him a new skill? Probably not, I’m guessing he wouldn’t be listening very well at that point. So the best time to teach calming strategies is while your child is already calm. It sounds counter-productive but we’ll get to the actual calming part later. Try a whole bunch of calming strategies with your child and see which ones he seems to do well with or he seems to like the most. Keep trying them until you get about 4 that your child can do fairly well. It helps if each strategy has its own picture to go with it so your child can learn what they are. You can create your own pictures (like take pictures of the child doing the strategy) or you can use the ones created above..

Here are some strategies to try with your child. Show him how to do each one and then have him do it with you. After you’ve practiced them several times, have your child do them by himself so you can see which ones he’s learning the best. This will help you pick your four.
The Balloon: Have your child hold his hands in front of his mouth like holding a small balloon. Tell your child to blow up the balloon. As he blows, he spreads his hands apart to pretend the balloon is getting bigger. Once the balloon is as big as it can get, your child claps his hands together to “pop” the balloon.
The Pretzel: Have your child fold herself into a pretzel and squeeze. Have her wrap her legs together and fold her arms across her chest like she’s hugging herself. When she is as twisted as she can possibly get, have her squeeze hard.
Take a Walk: Have your child take a walk to cool off. Sometimes just walking around a bit can help.
The Bunny: Have your child pretend to be a bunny. He can get down on the ground like a bunny or just sit on his bottom. Have him breathe like a bunny does in short, quick breaths. Don’t let your child do this too long or he might get dizzy but a little bit of shallow breathing can bring his breathing back under his control. Follow this up with some long deep breaths, like hissing like a snake or blowing out candles.
Write a Letter: Have your child “write a letter” about why she’s mad. Get out a piece of paper and a big fat crayon. Have your child scribble violently all over the paper. This should release some tension. If your child is older, you may actually be able to get her to write down why she’s mad. When she’s done, have your child read it to you or just crumple the paper and throw it away. If this strategy works for your child, you can have a calm-down bucket or stash that has paper and a crayon just for such an occasion.
Count or Sing the ABCs: Have your child count as high as he can or sing/say the alphabet. Many times this is enough to bring the breathing back under control to quell the tantrum.
Hug a Pillow/Stuffed Animal: Have your child pick a pillow or stuffed animal to hug. Tell her to squeeze it hard so she can get all of that upset out. She could also tell her stuffed animal why she’s upset


4. Make a Calming Strategies Board and Practice


Choose the four strategies that work best for your child (and feel free to use your own if you know of something that works for your child) and put them together on a board. It’s best if you get some sturdy poster board for this as it may be thrown across the room in anger at first. Cut out the pictures from my printout or make your own and put the four pictures (with descriptions) on the board. You should also put the mood thermometer on the board so you can use it to show your child. While your child is still calm, show her the board and say “this is what we will use when we are upset. When your body is red (point to the red on the thermometer) and you are upset, we will use these calming strategies to make your body green and help you calm down.” Have your child practice each of the calming strategies while she’s calm so you know she can do them. You could also pretend to be upset at some point and go over to the board to show her how to use it. Role playing is great for young children and those with language delays. You can also create a smaller version of this board to stick in your purse in case you need it on the go.


5.Practice the Calming Strategies When Your Child is Upset


Now that your child knows the strategies, it’s time to put them into action. The next time your child starts to get upset, try to catch it before he gets completely out of control mad. Say “Your body doesn’t look green, let’s get our calming board”. Bring him the calming board and show him where he is on the thermometer. Label his emotion for him by saying “You are upset” or “you are mad”. Then, ask him to pick a calming strategy to try. If you’re lucky, he’ll remember his training and pick a strategy so you can help him through it. More likely though, he will be so mad about it that he will refuse to choose and possibly even try to cause harm to your board. Remain calm, this too will pass. If he doesn’t want to pick a strategy, you pick one for him and demonstrate it. Don’t force him to do it with you. Then, wait a minute or two and try that whole process again. Eventually, he should calm down enough to be able to do a strategy. However, the first several times you try this, it may take a while, especially if he’s just now getting used to you not giving in to his tantrums. Just keep trying it every few minutes until he’s ready to do one with you. If you stay calm, that will bring him down even faster. Eventually, your child should be more willing to do this. If you do it consistently with him, he will get to the point where you can say, “You look like you need to calm down, why don’t you go pick a strategy. When your body is green again, we can talk (or I can give you a hug)”. Then, he should be able to go calm himself down using the strategies you have practiced so many times. Keep in mind it may be a long way down the road before he can do this on his own, but that’s the overall goal. Once your child is calmed after a tantrum, talk with your child calmly about what happened and what you can do to solve the problem. Now is the time to work through the problem, now that he’s calm.

Keep calm and be persistent and you can teach your child these calming strategies as well.

(Image courtesy Google)


Posting some story books on Anger Management..(Available on Amazon)

Tuesday, January 3, 2017

Teaching Rhyming Words To Special Need Children


Why teach about rhyming?

Developing a child's phonological awareness is an important part of developing a reader. Young children's ability to identify rhyme units is an important component of phonological awareness. Research shows that students benefit from direct instruction on rhyme recognition paired with fun activities that target this skill.


Body Name Game

How to Play: Begin by modeling how to rhyme. Point to parts of your body, say a rhyming word and your child should say the body part. This puts rhyming into her ears with a visual cue (pointing). If you point to your nose and say rose, she will automatically say nose.

1. Tell your child, "We are going to play a rhyming game. Rhyming words have the same sound endings. I'm going to point to something on my body, and say a word. You're going to say the body part that rhymes. Okay?"

2. Give her two examples: "I'm pointing to my leg, and I say beg. You say leg. I'm pointing to my nose. I say rose, and you say nose.

3. Here's a list of body parts and rhyming words:


deer-ear
pail-nail
sack-back


go-toe
gum-thumb
put-foot

bye-eye
deck-neck
see-knee

bear-hair
fin-chin
band-hand

peek-cheek
farm-arm
feel-heel


4. When your child is able to do this, turn it around. Point to your knee and your child will say a rhyming word such as bee or me!

5. When your child rhymes body parts, play this game:

a. Say, "I'm going to say a word and you'll tell me as many rhyming words as you can. I say bee." Your child then says words such as "he, she, we three, free, or agree."

b. Choose one-syllable words that are easy to rhyme with such as had, rat, man, fall, ten, red, big, fill, hop, dog, bug and sun. All of these have multiple words that rhyme.

Read a Ton of Rhyming Books


In my opinion, introducing rhyming to children is best done by reading rhyming books. It exposes the kids to how rhymes sound in a meaningful, engaging manner. While reading such books to the kiddos, it’s easy to point out the rhyming words by saying, “I hear rhyming words! ‘Dog’ and ‘fog’ rhyme.” A simple extension would be to have the children come up with more words that rhyme with words in the book. Tomorrow I’ll share specific rhyming books that I enjoy reading with kids.

Songs and Finger Plays

Another wonderful way to introduce rhyming is through songs. Most kids love to sing, listen to, and dance along to music. With the youngest children, simple finger plays do the trick. They’re short, contain rhyming words, and involve the kids in the music. “Ring Around the Rosey” and “The Itsy Bitsy Spider” are favorites for a reason! As children get older (moving from toddlers to preschoolers), they still enjoy finger plays. The older children also enjoy longer songs to sing and dance to, and rhyming words are often a part of such songs.

Use Children’s Names

Children’s names are incredibly meaningful to them, making names an awesome teaching resource! Simple word plays with children’s names (and the names of those important to them) is another way of introducing rhyming concepts. Here are some ways to use names when introducing rhyming:

· Call kids by rhyming versions of their names —sam jam, Ram shyam , Super Cooper, etc.

· Insert children’s names into songs and poems — “The itsy-bitsy Riddhi climbed up the water spout . . .”

· Play goofy name games that involve rhymes — “If your name rhymes with Fairy, jump up and down. If your name rhymes with moon, turn around in a circle.”

· Sing some version of “The Name Game” with your children/students. A shorter, simpler version might be the best way to start with this.


Rhyming Basket

Objects are placed in a basket (one object for each child present), and the basket is passed around the circle. As each child gets the basket, I say a word (such as “fizzers”) and they pull out the object that rhymes (“scissors”). You can use any objects, because it doesn’t matter if the rhyming words are real words or nonsense words.


Erase a Rhyme

Draw a picture on a dry erase board, such as grass, sky, tree, flower, and sun. Say a word, such as tower, and have a child come up to erase what rhymes (flower); erase what rhymes with bee (tree); erase what rhymes with fun (sun). Continue until the whole picture is erased. Draw on a dry erase lap board before the children arrive, so that they don’t have to wait while you draw. Usually, after I’ve drawn a few, some of the children will volunteer to draw one for the next day.


Rhyming Rings

Hook words that rhyme together on a metal ring. Include a picture with the word. Children flip through the picture cards and say them into a PVC phone. Example: bag, tag, rag, wag. You can make these using clipart, or save time and purchase


I hope this blog will be helpful in teaching Rhyming words..(Posting some Rhyming story books , nursery rhymes and picture of activities..)


Cheers !!